Eggplant

Eggplant
Photo Credit: Google Image Search

Thursday, April 28, 2011

A Simple Spring Pasta

As many of you may or may not know, I am counting down the days until I get married. Counting down with joy or terror? Verdict is still out. I have found myself concerned over the strangest things...things that have never crossed my mind in the past. Let's just take the invitations for example, here I was trying to decide on a FONT and PAPER. I've never EVER looked at a letter or invitations to something and been like "Oh, what lovely font they chose to use" or "This cardstock is just beautiful." I actually don't even know what cardstock is!!!

Anyways, there's been a lot of strange drama, BUT, one excellent aspect of getting married (you know, besides committing to Matt...) is that I had a bridal shower! This bridal shower was lots of fun with lots of food and I walked away with a TON of great kitchen (and other) stuff.

One great thing about being good friends with a relatively accomplished food blogger is that she shows up, helps host an AWESOME bachelorette party, and gives AWESOME bridal shower gifts. My good friend Maris of the ever so classy In Good Taste blog gave me a hand mixer (which is SO awesome) and a cookbook that I had never heard of. This cookbook, called "Clean Food" by Terry Walters, although not on my registry, was pretty exciting to me. I immediately loved the book without even opening it (which just goes to show how much I trust Maris' opinion on cookbooks), but when I got home (and recovered) from the weekend and read the introduction, I realized that I loved what this book stood for. Sure this book is basically vegan, but Terry Walters never comes out and CLAIMS vegan because that's not the point. The titles and terms we categorize ourselves in can turn others off. Instead, Terry has created an awesome book that encourages seasonal and local produce.

LOVE!

So, I took a stab at one of the more simple recipes in the "Spring" section. This was a recipe for Mediterranean Pasta with Greens.

The only thing I really messed up was that I didn't use mirin (once again, used sherry), and I used canned chickpeas (the cooked ones I had in the frigde had gone bad). Oh, and I also didn't use any parsley. I find that herb to be useless...I'm sorry.

This was SUCH a simple yet pleasant dish. With TONS of leftovers. I feel like Matt and I tend towards the really LOUD flavors and this dish reminded us that sometimes, the more subtle flavors can be just as satisfying.


That's not to say that Matt didn't add hot sauce.


We're trying...

Here's the recipe for Mediterranean Pasta with Greens from "Clean Food."

Ingredients:

1 pound penne or fusilli
3 TBSP extra virgin olive oil
3 garlic cloves, minced
1 small onion, chopped
1 TBSP dried basil
2 tsp. dried oregano
1 1/2 C. cooked chickpeas
2 C. canned diced tomatoes with their liquid
2 TBSP tomato paste
1/4 C. mirin
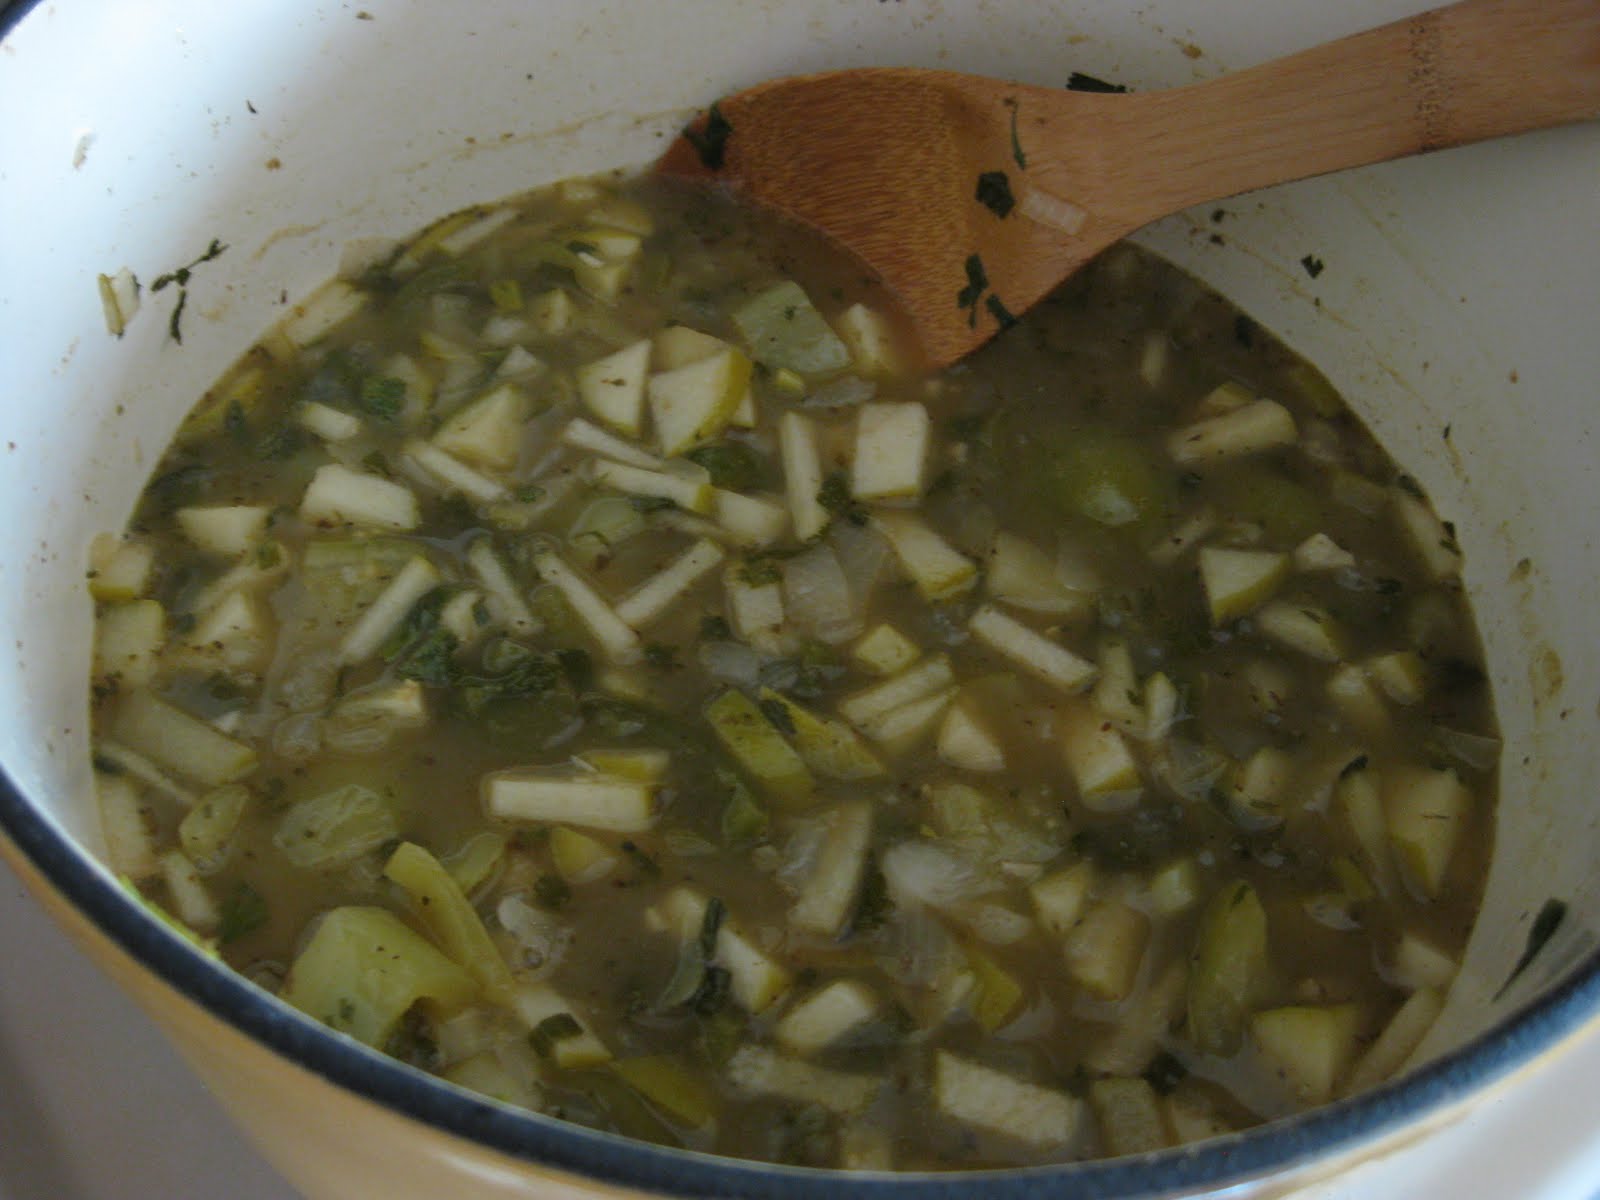
1 small bunch kale, chopped into bite-size pieces
salt and pepper
chopped fresh parsley for garnish

Directions:

Cook pasta according to directions, rinse, drain, and return to pot. Drizzle with 1 TBSP olive oil and set aside.

In large pot over medium heat, saute garlic and onion in 2 TBSP olive oil until soft. Add basil, oregano, chickpeas, tomatoes, tomato paste and mirin. Saute 5 minutes laonger. Add kale, then cover and cook 3 minutes or until soft. Uncover and stir to combine. Season with salt and pepper, toss the pasta in, heat through and serve.

Wednesday, April 27, 2011

Crazy about Cassoulet

My adventures in the kitchen have reached a furious and tiring pace! This fanatical fever has caused me to cook some awesome dishes, but also, some MAJOR flops. As I continue to get more confident, I can tell things are going to go well within about 30 seconds of the experience. Usually if it is going to be a BAD experience, I will have a) spilled something really dramatically, or b) Matt will have injured himself with a knife...all within 30 seconds of beginning.

Thankfully, neither of these things happened for this recipe. In fact, I knew that this was going to be great. I had never cooked with leeks before and was thoroughly enjoying that experience, and just all in all, I was happy to be doing what I was doing, when I was doing it.

When I decided to cook this recipe for Leek and Bean Cassoulet with Biscuits, I was mostly drawn to the "with Biscuits" part. I thought it sounded AWESOME to be able to cook biscuits on TOP of the dish...whatever cassoulet is. Then, to make sure I knew what I was getting myself into, I googled "Cassoulet." In case you were wondering (and I obviously was), Cassoulet is a rich, slow-cooked bean stew or casserole originating in the South of France.

So, it's a stew...why couldn't we just call it that?

Anyways, this was delicious. I thought I would hate leeks because I am not a big onion person, but the leeks were sweet and almost had the consistency of noodles in the dish.

Here is a picture of all the veggies cooking away...


Then here's a pic of the biscuit dough...


And here it all goes into the oven...


And then here's the finishes product!


Don't let the bland colors fool you. This dish was TASTY and I had tons of leftovers so I had a nice warm meal to make it through the strangely cold and snowy mid-April days. Spring, are you there?

Anyways, here's the recipe for Leek and Bean Cassoulet with Biscuits from none other than, Veganomicon.

Ingredients:

Stew:
2 yukon gold potatoes, cut into 1/2 inch dice
3 cups vegetable broth
3 tablespoons cornstarch
2 tablespoons olive oil
2 leeks, washed well and sliced thinly
1 small onion, cut into medium size dice
1 1/2 cup carrots, peeled and cut into 1/2 inch dice
2 cloves garlic, minced
1 heaping tablespoon chopped fresh thyme, plus extra for garnish
Several pinches of freshly ground black pepper
1/2 teaspoon salt (to taste)
3/4 cup frozen peas
1 (15 oz) can navy beans, drained and rinsed (about 1/2 can)

Biscuits:
3/4 cup plain soy milk
1 teaspoon apple cider vinegar
1 1/2 cups all purpose flour
2 teaspoons baking powder
1/4 teaspoon salt
1/4 cup nonhydrogenated vegan shortening

Directions:

PREHEAT THE oven to 425 degrees F.

Place the potatoes in a small pot and cover with water. Cover and bring to boil. Once boiling, let cook for about 10 minutes, until the potatoes are just tender enough to be pierced with a fork. Drain immediately so that they do not overcook. While they are boiling, you can prep the rest of the veggies and start preparing the biscuits -- the potatoes should definitely be done by the time you are.

Now prepare everything for the biscuits. You are not going to make them yet, but it's good to have everything ready when it comes time to top the stew. Add the vinegar to the soy milk in a measuring cup and set aside to curdle. Mix the flour, baking powder, and salt in a medium size mixing bowl.

Now leave that alone and start the stew:

Mix the cornstarch into the vegetable stock until dissolved.
Preheat an oven-safe skillet (if you don't have that, just transfer contents to casserole dish), preferably cast iron, over medium heat. Saute in the oil the leeks, onions, and carrots until very soft and just beginning to brown, about 10 minutes. Keep the heat moderate so they won't burn.

Add the garlic, thyme, freshly ground black pepper and salt, and cook for 1 more minute. Add the cooked potatoes and frozen peas, then pour in the vegetable stock mixture. Raise the heat just a bit; it will take a few minutes but the liquid will start simmering. Once it does, lower the heat again. Let it simmer for about 7 minutes, stirring occasionally, but no longer than that. If you need more time for the biscuits, then turn off the heat under the stew.

Back to the biscuits:

Add the shortening to the flour in small slivers and work it into the dough with a fork or with your fingers until large crumbs form. You don't want to cream it in; there should be clumps. Drizzle in the soy milk and mix with a fork until everything is moistened (some dry parts are okay).

Wash and dry your hands, then lightly flour them and get them dirty again. Gently knead the dough about ten times right in the bowl, just so that it is holding together and not very sticky. If it seems sticky, as in sticking to your fingers, then gently work in a little more flour. Set that aside and check on your stew.

The stew should be simmering and slightly thickened. Mix in the beans. Now, let's add the biscuits. Pull of chunks of dough that are about slightly larger than golf balls. Gently roll them into balls and flatten a bit; they do not have to be perfectly round. Add them to the top of the stew, placed an inch or so apart.

Transfer the whole megillah to the preheated oven. If you are worried about spillover, place on a rimmed baking sheet, but we've never had that problem. Bake for about 15 minutes. The biscuits should be just slightly browned and firm to the touch.

Remove from the oven and use a large serving spoon to place some of hte stew and a biscuit in each shallow, individual bowl. Sprinkle with a little chopped, fresh thyme.

Serve at last! Especially yummy when you break up your biscuit and mix it in a bit with your stew.

Tuesday, April 26, 2011

An Udon Revelation!

Call me crazy, but I've never EVER cooked udon noodles. I've always loved them (although honestly, I had no idea that they were called "udon noodles" when I would eat them in my favorite Asian dishes), but never got around to cooking them.

Since I've been on an experimental kick these last few weeks, I decided to try this recipe out for Udon with Shiitake Mushrooms and Kale in Miso Broth from Veganomicon.

This was a definite experiment because I had been scouring the grocery store to find miso paste for a few weeks and FINALLY found some in Whole Foods. It was also an experiment because of the udon, but mostly it was risky because Matt hates miso soup (he says it tastes like feet) and is also not a huge fan of kale.

Tough.

This was outSTANDING!

I loved this so so so so much that I intend to make it again the next time I have houseguests (which may not be for a long time to be honest, since the wedding nonsense is still here).

Anyways, there were a few booboos here, but all in all a GREAT soup!
-The ginger was not cut up all the way (cough cough MATT'S FAULT cough cough) so every bite or so you would get a HUGE dose of ginger.
-I am on a similar search for mirin now as I was initially for miso paste. I substituted sherry. Matt has taken to drinking a glass of sherry every now and then...it makes him smell like a 90 year old woman.
-I used light miso paste rather than dark miso paste (you honestly mean to tell me that after weeks of searching for miso paste that there are different varieties??? Give.Me.A.Break.). The recipe said to add a tablespoon or so if using light miso to make sure the flavor is strong enough. I used about 4 or 5 tablespoons.

Udon noodles cook so quickly and then have that delectable worm-like texture. I want to start cooking with them more.


We topped this off with a healthy dose of Rooster Sauce and honestly, this was DELISH!


Here's the recipe for Udon with Shiitake Mushrooms and Kale in Miso Broth from "Veganomicon"

Ingredients:

1/2 pound fresh udon noodles or dried udon noodles
2 tablespoons vegetable oil
1 medium sized red onion, sliced into thin half-moons
4 ounces shiitake mushrooms, stems trimmed, sliced
3 cloves garlic, minced
2 teaspoons ginger, minced
2 tablespoons mirin (optional)
2 1/2 cups water
3 tablespoons dark miso
4 cups chopped kale
2 1/2 teaspoons soy sauce, or to taste


Bring a pot of water to a boil. Cook the udon according to the package directions, about 10 minutes. When done, drain and rinse with cool water until read to use.

Meanwhile, preheat a large skillet over medium heat. Saute the onion and mushrooms in the oil for 5 to 7 minutes, until the mushrooms are tender and the onions are softened but still have some crunch. Add the garlic and ginger, and saute for another minute.

Add the mirin, water, and miso, and bring to a gentle boil. Lower the heat to a simmer and add kale. Toss the mixture around with tongs until the kale had wilted. Add the noodles and use a pasta spoon to stir them into the broth for about 2 minutes.

Divide the udon and vegetables among bowls and spoon some broth over each serving.

Monday, April 25, 2011

Bread Salad

It's no secret that the "salad" is maybe my least favorite type of dish around. Although I am able to put together a pretty mean dish from a salad bar, I am almost ALWAYS underwhelmed by salads you order at restaurants and salad recipes. Unless your ingredients are at the exact MOMENT of their most PERFECT stage/flavor/texture, I find myself bored. Then I end up dousing the stuff with dressing or add-ons, which sort of defeats the purpose. All of this is not to say that salads and those who eat them are inherently boring...it's just that I think my palette (is that the right spelling?) is too immature to fully appreciate what I'm eating.

So, when I saw this recipe in "Supermarket Vegan" for Grilled Tuscan Bread and Summer Vegetables, I was intrigued. Grilling vegetables is always great. And if the vegetables bored me, at least there would be bread.

I know it's not summer, but I learned something new a few days ago. I learned that eating vegan for one day is STILL better for the environment than eating local/seasonal for the entire week! This is not to say that people should stop TRYING to eat locally and seasonally, but I haven't purchased a banana in over 5 years, and it's my favorite fruit.

The deprivation is killing me.

In order to really get a variety in this vegetable heavy diet, I can't just eat brussel sprouts for an entire season.

Anyways, enough of that.

This was a delicious and colorful meal.

Here's where I screwed up:
-I completely forgot the onion. Just plum forgot. Still was good though.
-I mixed ALL of the oil in at once, rather than making the marinade with only 3 tablespoons of the oil. Therefore, I brushed the marinade/dressing on the vegetables rather than just olive oil. This was ok, but really, way too much olive oil. I'd half this next time.
-Couldn't wait 20 minutes to let it all blend together. Too hungry.


Despite the fact that this meal was a salad, and salads usually strike me as being easy and fast to prepare, this took awhile and was not necessarily something that was easy to whip up on a whim. All the flipping and roasting was quite intense...

Here's the recipe for Grilled Tuscan Bread Salad and Summer Vegetables Grifrom "Supermarket Vegan":

Ingredients:
-4 1/2 tablespoons olive oil (yowza that was alot...)
-2 tablespoons lemon juice
-1 tablespoon red wine vinegar
-2 large garlic cloves, 1 finely chopped, 1 peeled and cut in half
-1/2 teaspoon salt, plus additional to taste
-Freshly ground black pepper, to taste
-2 medium bell peppers (about 6 ounces each), preferably 1 green and 1
red, cored and seeded, and cut into 1 1/2 inch wide strips
-2 medium zucchini (about 6 ounces each), preferably 1 green and 1 yellow,
cut lengthwise into inch thick slices
-1 medium red onion (about 6 ounces), cut into 1/4 inch thick rounds (I
forgot the onion and it was still good)
-6 ounces Italian bread, cut crosswise into 1 inch thick slices
-2 medium vine-ripened tomatoes (about 6 ounces each), coarsely chopped
-1/2 cup chopped fresh basil
-Italian seasoning, dried oregano, and/or crushed red pepper flakes, to
serve (optional)

Directions:

Prepare a medium-hot charcoal or gas grill, or preheat a broiler (I broiled). Position the grill rack or oven rack 4 to 6 inches from the heat source. If broiling, lightly oil a large baking sheet and set aside. Alternatively, place a stovetop grilling pan with grids over medium-high heat.

Meanwhile, in a small bowl, whisk together 3 tablespoons of the oil, lemon juice, vinegar, chopped garlic, salt and black pepper until thoroughly blended. Set aside.

Brush both sides of the bell peppers, zucchini, onion, and bread slices evenly with the remaining 1 1/2 tablespoons of oil; sprinkle the vegetables lightly with salt and pepper. Set aside the bread.

Grill or broil the vegetables until browned and tender, working in batches as necessary. As a general rule, cook the bell peppers 3 to 4 minutes per side, and the zucchini and onion 2 to 3 minutes per side. Place the vegetables on a baking sheet (another baking sheet, if broiling) as they finish cooking.

When all the vegetables have been cooked, grill the bread until lightly browned, 1 to 2 minutes per side. Cool slightly, and then rub one or both sides with the cut sides of the halved garlic. Tear bread into bite-sized pieces and transfer to a large bowl. Cut the grilled vegetables into 1 inch pieces and add to the bread bowl, along with the tomatoes and basil. Add the reserved dressing, salt, and black pepper and toss well to thoroughly combine. Let stand 20 minutes. Toss well again and serve at once, with the optional seasonings (if using)passed separately.

Wednesday, April 20, 2011

Frozen veggies=fast dinner.

I generally avoid the frozen food section. Except for instances like this. Frozen fruits and veggies especially make me nervous. Idunno. Something deep within me starts to bristle at the idea of freezing these nutritious things and I think to myself "They couldn't possibly still be healthy/taste good/have been good in the first place..."

I assume hope I'm wrong, but I've yet to see any real concrete evidence that frozen veggies are as good for you as fresh ones.

But I was rushed last week.

And the idea of buying a pack of pre-cut mixed Asian veggies was really too good to pass up.

So I bought a frozen Asian veggie mixed bag.

This meal took about 10 minutes (not including rice cooking time - I used long-grain brown rice...Matt loathes this rice). This was a life saver for me this past week from hell, but I'm not sure I'll try it again. I like peanut sauce, but this was too sweet. I had to load on the Rooster Sauce to try and combat it. I did however like how many different kinds of vegetables I was able to eat in this one meal.

Here's a pic of it all cooking up.


And here's a pic of the finished product:


Here's the recipe from Supermarket Vegan.

Ingredients:

1/2 cup water
2 1/2 tablespoons creamy peanut butter
1 tablespoon low sodium soy or tamari sauce
1/2 tablespooon cornstarch
2 large cloves garlic, finely chopped
1 teaspoon ground ginger
Pinch, or more, cayenne pepper (optional)...we used a lot more than a pinch
1/2 tablespoon peanut oil
1/2 tablespoon toasted (dark) sesame oil
1 16-ounce bag frozen Asian-style mixed vegetables, slightly undercooked
according to package directions, drained
3 cups hot cooked white or brown rice

Directions:

In a small bowl, whisk together the water, peanut butter, soy sauce, cornstarch, garlic, ginger, and cayenne (if using) until thoroughly blended; set aside.

In a large nonstick skillet, heat both the oils over medium-high heat. Add the mixed vegetables and cook, stirring, 1 minute. Reduce the heat to medium-low and add the peanut butter mixture. Cook, stirring, until the sauce thickens, about 3 minutes. Serve at once, over the rice.

Tuesday, April 19, 2011

Chocolate-Hazelnut Biscotti!

As I've gotten older and much wiser, I've come to appreciate the finer things in life: wine that costs more than $5.00 a bottle (but still costs less than $10.00), reading for pleasure (gossip magazines count, right?), fine music (Steve Winwood, anyone?), and drinking coffee. I adore coffee and drink a ginormous glass a day (my reusable Venti-sized Starbucks cup comes with me to work every morning). For a short period I wondered if maybe I was becoming too reliant on this stimulant in the morning, but after cutting it out of my diet and feeling no signs of withdrawal, I thought it was safe to bring it back.

I used to get fancy shmancy coffee from Starbucks on a regular basis, but now that I have a Keurig coffee machine, I feel guilty and instead opt to brew from home and then add some hazelnut non-dairy creamer. It's probably just as good as what Starbucks can come up with when I order my "Grande soy Hazelnut Latte."

At least that's what I tell myself.

Anyways, I love the EXPERIENCE of drinking coffee in the morning. I love cupping the warm...well, cup and then feeling awake and perky. Anything that can add to this experience...like a snowy sky or a lazy Saturday morning, well, it just makes me really really happy.

SO, when the option to make a sweet treat to enjoy while drinking coffee came around, I was ALL FOR IT.

Enter Chocolate Hazelnut Biscotti. I like Chocolate and I like Hazelnut. Let's do this.

This biscotti was delicious and although intended for the mornings, I ended up eating it as a dessert. I only had about half the amount of hazelnuts that the recipe called for, but these were still great.

Here's the log before going into the oven...don't judge how much standing oil is on the pan. My spray can is busted.


Here they are coming out of the oven...yum.


A close up...just because I'm so proud.


I probably could have baked these for a little longer because they were still a little soft when they came out, but after a couple of days they were nice and crunchy.

Here's the recipe for Chocolate-Hazelnut Biscotti from Veganomicon:

Ingredients

1/3 cup almond or soy milk
2 tablespoons ground flaxseeds
3/4 cup plus 2 tablespoons sugar (I forgot the additional 2 tablespoons)
1/2 cup canola oil
1/2 teaspoon vanilla extract
1/2 teaspoon almond extract
1 1/2 cups all-purpose flour or whole wheat pastry flour
1/3 cup unsweetened Dutch-processed cocoa powder or regular unsweetened
cocoa powder
2 tablespoons arrowroot powder or cornstarch (I used arrowroot because I
still had some laying around)
2 teaspoons baking powder
1/2 teaspoon salt
1 cup whole, raw hazelnuts (I used probably 1/2 cup)

Directions

Preheat the oven to 350F. Lightly grease a large cookie sheet.

In a large bowl, whisk together almond milk and flaxseeds, mixing for about 30 seconds. Add the sugar, oil, and extracts, and stir until smooth. Sift in the flour, cocoa powder, arrowroot, baking powder, and salt. Stir to mix and, just as the dough starts to come together, knead in hazelnuts. Knead very briefly to form a stiff dough; if some of the nuts pop out, just push them back in.

On the baking sheet, form the dough into a rectangle about 12 inches long and 3 to 4 inches wide. Bake for 28 minutes, until lightly puffed; the top may also be slightly crackled.

Remove from the oven, allow to cool for 30 minutes, until very firm.

Turn up the oven heat to 375F. Carefully transfer the baked dough to a cutting board. With a heavy, very sharp knife (or use a serrated knife), slice 1/2-inch-thick slices. The best way to do this is in one pushing-down motion; don't saw the slices off or the slices could crumble. Be gentle when handling the biscotti at this time, they are delicate.

Set the slices on the cookie sheet cut side down and bake for 12 to 15 minutes until your desired level of brownness and crispness is achieved.

Remove from the oven and cool for a few minutes on the baking sheet before transferring the slices to a cooling rack. When completely cool, store in an air-tight container.

Monday, April 18, 2011

My Favorite Chicago Restaurant

I didn't do much cooking over the weekend, mostly because it was the weekend of my bachelorette party and I had a bunch of out of town guests here for the festivities. It was a great weekend that in many ways reminded me that this whole wedding fiasco is really going to be alright as long as my friends and family are there.

Anyways, during the party we played a game where I was supposed to guess the answer my fiance Matt would have given to certain questions. Questions like "Where was our first date?" "What is Rachel's favorite color?" "What was Rachel wearing the first time we met" you know, that whole deal. I am not going to get too braggy, but I did REALLY well at this game. I missed probably 2 or 3 questions, one of which being "What movie does Matt cry in?" (I still have yet to see him cry in a movie, but maybe that's because we've never seen Rudy together), "Who's better at yoga?" (He said himself except for the "Birds of Paradise" position, which is absolutely false...I am better at yoga with the EXCEPTION being "Birds of Paradise"), and finally "What is Rachel's favorite restaurant?" Matt answered the question with HIS favorite restaurant, which I also love, but really, the answer to that question is absolutely Karyn's on Green.

*Photo Image Credit: http://www.karynsongreen.com/gallery.htm*


And since I JUST went to this place with Maris a few weeks ago, what better time to review the experience. No pictures, sorry. Too much eating going on...

First of all, this place is beautiful, and I've never had to wait to get in. It's also only about 10 minutes from my house which is an added perk.

And, it's completely vegan.

And delicious.

Look at this place...don't you just want to camp out and spend 4 hours enjoying vegan food here?

*Photo credit: http://www.karynsongreen.com/gallery.htm*

The first time I came here, Matt, Maris and I spent at least 5 hours (and FAR too much money) sitting outside on a beautiful late summer/early fall evening. This was before I had even started thinking about going vegan so I was a little nervous, but after my first bite of those delectable french fries, I was hooked.

This last time, Maris and I didn't stay as long, but quite possibly ate more between the two of us than when Matt was with us.

We started with the Roasted Foraged Mushrooms and Steak Fries. The mushrooms were delicious, but really, those fries are INCREDIBLE. We annihilated the two sauces (which is probably my main reason for eating these...the BBQ and chipotle sauces are OUT OF THIS WORLD).

We thought we needed to have a LITTLE green in our diet, so we ordered the endive salad which reminded me that I LOVE endives! Who knew? Seriously, so good.

We then moved on to the Entrees which we sort of split, but not exactly. I ordered the Fra Diavolo. This was OUSTANDING. I was realllllly nervous about the fact that it said "tempeh crab" and even went so far as to ask the server if the tempeh crab was SHAPED like a crab (he looked at me with the kind of look you would expect following such a weird question), but seriously, I wanted to kick myself for eating so much before this dish came out because I wanted to destroy it right then and there. I wish I could tell you what Maris ate, but I can't remember. I just know she had some of their brussel sprouts which were also to die for.

If I had to say there was anything LESS than perfection in this meal it would be the foraged mushrooms. They were still incredible, but the rest of the meal left me in a euphoric state for about 2 days that I'm pretty sure can only be reenacted with heavy drug use.

Please go here. Even if you aren't vegan. It brings tears to my eyes just thinking about it.

And Karyn, if for some reason you're reading this...I love you.

Thursday, April 14, 2011

You Put the Lemon in the Coconut

I made another bundt cake.

I'm sorry, ok?

I know this blog now has 2 bundt cake experiments and not a SINGLE regular cake, or pie, or brownie, or numerous other things, but bundts are so dang simple! And I like my red bundt cake pan. It makes me happy. And isn't that what this is all about?

I wanted to make a bundt cake so badly that I even used 2 ingredients that I don't tend to like: coconut and lemon.

My reason for disliking coconut? Not sure. I love Pina Coladas and Mounds Bars, but that's the extent. The texture of coconut in most other settings gives me the willies.

My reason for disliking lemons? Well, this all goes back to my first year post college. During this year, there were many new experiences for me in the kitchen. I started slowly and bought a Rachael Ray book and was having moderately good results. Then I tried a recipe for stuffed tomatoes. The recipe looked good, but it required a HUGE amount of lemon zest. I didn't have a zester at the time, so I ended up using a knife to get the zest. The end result was a disgustingly lemony filling that was almost impossible to chew because of the large chunks of zest. I vowed then and there never to order anything with lemon in the title and never even DREAM of cooking with it.

I broke my vow this past weekend. I did it all for the bundt.

This was a relatively simple recipe, but I did mess up a few key parts.
-I didn't have granulated sugar, but only raw sugar cane. Not sure if that matters, but I only used a cup since...
-I couldn't find unsweetened coconut at my grocery store, so I bought sweetened.
-There were no 14 oz. cans of coconut milk, only 13.5. I used that.
-I was WAY nervous about the lemon zest (see above), so I think I only used about 1 tablespoon rather than 3.
-I used the baking powder that had mysteriously ended up in the fridge. I hope that you can still cook with that stuff after it's been used to absorb a stench...that's even gross for me to read.


All in all, this turned out ok. Not my favorite of flavors, but that was to be expected. Nothing really can compare to my last bundt endeavor.


Here's the recipe for Coconut Lemon Bundt Cake from Veganomicon.

Ingredients:

1-1/2 C granulated sugar
2/3 C canola oil
1 (14-oz) can coconut milk
1/4 C soy milk
1/4 C lemon juice
3 Tbs lemon zest
2 tsp vanilla extract
3 C flour
2 tsp baking powder
1 tsp baking soda
1 tsp salt
1-1/2 C shredded unsweetened coconut
A few tablespoons confectioners’ sugar

Directions:

Preheat oven to 350. Lightly grease an 8 or 10″ Bundt pan. In a large mixing bowl, combine the granulated sugar, oil, coconut milk, soy milk, lemon juice, lemon zest, and vanilla. Stir to combine.

Sift the flour, baking powder, baking soda, and salt into the wet ingredients in batches, mixing well after each addition. Stir to combine.

Pour batter into the Bundt pan. Bake 1 hour or until a knife inserted through the cake comes out clean.

Remove from the oven and let cool for about 10 minutes, then place a cutting board over the cake pan, gently flip over and release the cake from the pan. Let cool completely. Once cooled, sift a sprinkling of the confectioners’ sugar over the top.

Wednesday, April 13, 2011

Hummus Pizza

I have a love hate relationship with hummus. I went through a phase where I ate hummus ALL the time and would slather that stuff on everything.

Then I went to the Holy Land.


And all I ever COULD eat was hummus. Hummus for breakfast, hummus for lunch, hummus for dinner.

I needed a sabbatical from hummus upon my return from traveling and basically swore off the stuff for 2 years. I slowly came around again and began to adore hummus almost as much as I did prior to my trip.

Then I went to Greece.

Hummus was served at every meal there as well. This was not even a year ago.


I am still recovering.


Anyways, despite the fact that I am not nearly recovered enough from my trip to Greece, I needed a quick meal and had a hankering for pizza.

So I tried this recipe for "Hummus Pizza with Sun-Dried Tomatoes and Kalamata Olives" from the Supermarket Vegan.

Unfortunately, Matt hates olives and sun-dried tomatoes.

I'm mean. But I really like BOTH of those things! The funny thing is, Matt really liked this pizza and I thought it was so so! Just goes to show you that you CAN teach old dogs new tricks...and that tastes can change depending on your mood.

(Yes, that's a heart shaped measuring cup...it was a gift)

So yea, if you need a quick and easy weeknight meal, here's a good option.


Hummus Pizza with Sun-Dried Tomatoes and Kalamata Olives from "Supermarket Vegan."

Ingredients:

1 1/4 cups prepared plain (classic) hummus
1 to 2 cloves garlice, finely chopped (I used two HUGE cloves)
1 (10- or 13- ounce) can refrigerated pizza dough
1/3 cup julienned, drained oil-packed sun-dried tomatoes, 1 tablespoon
marinade reserved
6 pitted kalamata or other good-quality black olives, halved (I would use
more than this)

Directions:

Preheat oven to 350F (175C). Lightly oil a standard-size baking sheet and set aside. In a small bowl, mix together the hummus and garlic until thoroughly blended; set aside.

Unroll the pizza dough onto the prepared baking sheet and press to fit. Brush the reserved sun-dried tomato marinade evenly over the dough, and then prick with a fork in several places. Bake in the center of the oven 12 to 15 minutes, until very lightly browned. Remove from the oven and spread evenly with the hummus-garlic mixture. Top evenly with the sun-dried tomatoes and olives. Place on the bottom rack and bake 5 minutes, until the edges are nicely browned. Cut into wedges and serve warm or at room temperature.

Tuesday, April 12, 2011

Green With Envy

I am a jealous person. I try not to be because I do find jealousy to be one of the most unattractive characteristics in a person, but nevertheless, I too fall prey to the grips of jealous tendencies.

But I don't get jealous about normal things. If a lady sparks an interest for Matt? No biggie. If someone has a nice house that is decorated just like I would? I don't really care.

What I covet is skill. I covet people who are creative. Artists, for example. I just cannot process how a person can create something beautiful out of normal everyday materials. Painters, sculptors, composers, and last but not least, chefs.

I have always been very good at following directions. I can perform music that others have written, I can follow recipes, heck, I can even do a decent job following a paint by number, but when the training wheels are removed, I flounder (just like I did when the real training wheels WERE removed...in 4th grade...don't judge me).

So, creative people make me envious. Green with envy. And this only became more evident as I cooked a "green" centered meal from Veganomicon that was so damn creative, I could hardly take it.

I made the "Manzana Chili Verde" because it seemed weird. Apples in chili? Gross-ville, population: ME (I love teenagers). But this recipe had enough redeeming ingredients that I love (like cilantro, lime, potatoes, white beans, etc. etc. etc.), that I decided to risk it.

And I'm glad I did.

I didn't mess much up on the recipe side, but the trip to the grocery store was definitely a learning experience. First of all, I had no idea what a Poblano pepper looked like. Should have google imaged that BEFORE going, rather than after, but here's a pic, in case you were wondering:

*Image Credit - Google Search

Frankly, I can't tell the difference between this picture and a regular old Jalapeno, so...I don't feel like I'm any smarter.

I ended up buying 2 of these bad boys:

*Image Credit - Google Search

Those are Hungarian Wax Peppers. I have no real idea why I bought these because I even saw the name. I think I liked the way they looked.

I also ran into a little snafu while trying to locate the tomatillos. I've never seen one of these before and when I asked the overly friendly produce guy if they had any, he said no.

I didn't believe him.

And lo and behold, I found those tricky tom toms! Who KNEW they had jackets?

*Image Credit - Google Search

But, I found everything I needed and the rest of the experience was rather painless!

This was awesome. I loved how tangy yet spicy this chili was (I assume that was due to the apple and pepper combo). Matt was not a real fan, but I was! And since it was so green, you couldn't help but think you were eating something SUPER healthy! The only annoying part was having to transfer the hot liquid to my food process to blend, BUT, something tells me I may be receiving a hand mixer in the near future (a.k.a. it says so on my registry).


Adding the avocado as a garnish really sealed the deal for me as well.


Here's the recipe for Manzana Chili Verde from Veganomicon.

Ingredients:

1 lb baby Yukon golds, cut into 1/2" pieces
2 T vegetable oil
1 large yellow onion, diced small
3 jalapenos, seeded and sliced thinly
2 poblano peppers, seeded and chopped into 1" pieces
4 cloves garlic, minced
3 t ground cumin
1 t dried oregano (preferably Mexican oregano)
1 t salt
1/3 c dry white wine
1 lb tomatillos, papery skin removed, washed, chopped into 1/2" to 3/4" pieces
2 Granny Smith apples, cored, quartered, and sliced thinly
2 c vegetable broth
1 c loosely packed fresh cilantro
1/4 c shopped scallions
1 (15 oz) can small white beans, drained and rinsed
Juice of 1 lime
Avocado slices for garnish

Directions:

Place the chopped potatoes in a small saucepan, cover with water, and bring to a boil. Let boil, covered, for a little less than 20 minutes, until the potatoes are easily pierced with a fork. Drain and set aside. Of course, you should be preparing everything else while it is boiling.

Preheat a soup pot over medium-high heat. Saute the onion, jalapenos, and poblanos in oil for about 10 minutes, until everything is softened and the onions are slightly browned.

Add the garlic, cumin, oregano, and salt. Saute for 1 more minute, until the garlic is fragrant. Add the white wine and tomatillos, raise the heat a bit to let the wine reduce and the tomatillos release their juices, about 5 minutes.

Add the apples, vegetable broth, scallions, and 1/2 c of cilantro. Lower the heat to a simmer, cover, and cook for 20 minutes.

Use an immersion blender to partially puree everything. If you don't have one, let the mixture cool slightly and pulse in a blender or food processor.

Taste for sweetness/tartness. Tomatillos are sometimes bitter; if that is the case, add a teaspoon or two of sugar and that should level things out. Add the cooked potatoes and the beans, simmer for a few more minutes, until everything is heated through.

Add the remaining cilantro and the lime juice. Ladle into bowls, garnish with the avocado and scallions, and serve.

Monday, April 11, 2011

So, adobo means spicy? Since when???

In my continual quest to expand my cooking experience, I once again decided to make 2 count 'em 2 dishes for 1 meal. I decided to do a little spin on "beans and rice" but since nothing about that sounds all that exciting, I went to Veganomicon. That cookbook makes my boring little life ever so much more delightful.

I decided to make the Chickpea Quinoa Pilaf as the base and then top it off with the Black Beans with Chipotle Adobo Sauce. Sounded simple enough. Had all the ingredients. I thought it all looked like a winning combination.

So, I started with the pilaf. What the heck is pilaf anyways? Glad you asked, because I dictionary.com-ed that very question and here is what I found. Pilaf: a Middle Eastern dish consisting of sautéed, seasoned rice steamed in bouillon, sometimes with poultry, meat or shellfish.

Well, if that's the definition, then this dish really WASN'T pilaf since quinoa is not rice, and there was no bouillion, poultry, meat or shellfish...

So...this is now awkward.

Anyways, I cooked it.

And I screwed up.

Here's what I did wrong:
-I bought coriander seed. I'm a dumby. As I began cooking, I realized I neglected to note that the coriander seed needed to be manually ground. So, there I was banging on those little buggers with the bottom of a knife trying to simultaneously crush them while also not killing myself. I only half succeeded. Thankfully, Matt reminded me that we have ground coriander. I used that, and then promptly updated my wedding registry to include a mortar and pestle for moments such as this.
-I tried to go all old school and cook the dried chickpeas myself. Bad idea. They did not cook all the way and therefore made the whole meal quite labor intensive on the chewing end. Oh well...I tried.

Other than those incidents, the "pilaf" turned out alright. It was a little bland though. Thank God the beans took care of that...and then some.


I then went on to the Black Beans with Chipotle Adobo Sauce also from Veganomicon.

This recipe seemed super easy. But this is where the real trauma sets in.

It's no secret that Matt and I love spicy food. We add "Rooster" Sauce to everything and even request "Extra Spicy" in Thai restaurants. So, we basically exist thinking that we must double if not triple the spicy factor whenever we cook from a recipe.

This recipe called for 2 chipotles in adobo sauce.

We used 6.

I almost threw up it was so spicy.

We were both sweating and I had to lie down after eating to allow for recovery.

Aycarumba. Never again.

Otherwise, this stuff was great!

Here are the beans cooking away...


And here is the sauce of Satan:


And here is the final product. Honestly, isn't this just beautiful (I hate it when people talk about food like this, but I get it...it really was pretty)?


I think I may need to try this recipe again, only with the called for number of adobos.

Here's the recipe for the Quinoa Chickpea Pilaf from Veganomicon:

Ingredients:

2 tablespoons olive oil
1 small yellow onion, chopped finely (about one cup)
2 garlic cloves, minced
1/2 teaspoon ground cumin
1 tablespoon coriander seed, crushed (spice grinder or mortar and pestle)
fresh ground pepper, to taste
1/2 teaspoon salt
1 tablespoon tomato paste
1 cup quinoa (rinsed well)
1 (15 ounce) can chickpeas, drained and rinsed (or 2 cups cooked)
2 cups vegetable broth (or reconstituted bullion)

Directions:

In a small stockpot over medium heat, saute the onions in olive oil for about 7 minutes. Add the garlic and saute for 2 more minutes.

Add the tomato paste, coriander, cumin, black pepper, and salt; saute for another minute.

Add the quinoa and saute for 2 minutes.

Add the chickpeas and broth; cover and bring to a boil. Once the mixture is boiling, lower the heat to very low, cover, and cook for about 18 minutes, or until the quinoa has absorbed all the water; stir occasionally.

Fluff with a fork and serve.


And here's the recipe for the Black Beans with Chipotle Adobo Sauce, also from Veganomicon:

Ingredients:

Beans
2 (15 ounce) cans black beans, drained and rinsed
1 bay leaf
3 cups cold water
1 large onion, peeled and halved
salt & freshly ground black pepper

Chipotle adobo sauce
1 large onion, diced
4 garlic cloves, minced
3 tablespoons olive oil
2 chipotle chiles in adobo, minced
2 tablespoons adobo sauce

Directions:

Combine the beans, onion, bay leaf and water in a large saucepan. Bring to a boil, then let boil for 1 minute. Lower the heat to medium and simmer, uncovered, for 40 minutes, until the beans are very tender and about half the water has evaporated. Remove the bay leaf and onion before serving.

While the beans are cooking, prepare the chipotle adobo sauce: In a heavy bottomed skillet over medium heat, saute the onion and garlic in the olive oil until the onion is very soft, 10 to 12 minutes. Stir in the chipotles and adobo sauce, cook for 30 seconds, and remove from heat.

Allow to cool a few minutes, empty the sauce into a food processor bowl, and briefly pulse until a chunky sauce forms. You may also use an immersion blender to do this. Serve the sauce drizzled over individual servings of beans.

Thursday, April 7, 2011

Accidental Crockpot Chocolate Souffle

I have mentioned before how much I love my crockpot. And one thing I realized after perusing the internets and buying a few crockpot cookbooks is that you can make DESSERTS in the crockpot!!! What could be better than mixing up some sweet ingredients, letting them cook all day, and having a delicious dessert to come home to?? Nothing, I tell you, NOTHING.

So, I went to my trusty "Fresh from the Vegetarian Slow Cooker" and looked through their dessert options. Unfortunately, there were few vegan options, and the vegan options that were there were not necessarily my cup o' tea. I like chocolate. I like brownies. I like cakes. I don't particularly like fruity desserts...they feel too healthy even if they are slathered in oil and butter and the like. BUT, I did find the recipe for "FUDGY CHOCOLATE PUDDING CAKE." Now, pudding? Not my fave, but sneak that word in amongst fudgy and chocolate and cake, and NOW you're speaking my language.

So I gave this a go.

My biggest problem with this recipe is that I did not have a dish that could easily fit in my crockpot on top of the rack. So I ended up using a regular old bowl that I had and this was not as attractive or useful as I would have liked. I couldn't really cut out servings when it was done which basically gave me an excuse to house half of it in one sitting because, hey, it was in a soup bowl and I couldn't store it that well.

I'm also pretty sure that cooking this in the crockpot was unecessary and actually complicated things more. I cooked it longer than 3 hours because I never use that thing unless I'm going to be gone for longer than 3 hours, so that too was a little weird.

This was...ok, not bad, but not great either. It had the consistency of a pudding/souffle, nothing cake-like about it. I'm still holding out for a more exciting and innovative way to cook desserts in my crockpot.


I obviously did not mix this together well enough either because there are white flakes in the stuff. Oh well.

Here's the recipe from "Fresh from the Vegetarian Slow Cooker."

Fudgy Chocolate Pudding Cake

Ingredients:

2 cups boiling water
1 cup sugar or natural sweetener
2 tablespoons corn oil or other mild-tasting oil
1 1/2 cups soymilk
1/2 teaspoon vanilla extract or liqueur of choice (I used vanilla)
1 cup unbleached all-purpose flour
1/2 cup unsweetened cocoa powder
2 teaspoons baking powder
1/4 teaspoon salt

Directions:

Place a rack or trivet in a 6-quart slow cooker. Pour in the boiling water, cover, and turn the heat setting to High. Lightly oil a baking dish that will fit inside the cooker.

In a large mixing bowl, beat the sugar and oil together until well blended. Stir in the milk and vanilla.

In a small mixing bowl, combine the flour, cocoa, baking powder, and salt. Fold the dry ingredients into the wet ingredients until just blended. Pour the batter into the prepared dish and cover tightly with aluminum foil, making several holes in the foil for steam to escape. Set it on the rack, cover, and cook on High for 3 hours, until a toothpick inserted in the center comes out clean.

Let stand at least 10 minutes before serving. Garnish with almonds and serve warm or at room temperature.

Tuesday, April 5, 2011

Sprouts and Shrooms

I'm back from traveling. Again. This time, I hope to be able to actually unpack my suitcase and leave it stowed in my closet for at least 2 weeks, but we shall see. Boston was great and I had a few great vegan meals (and a few not so great, but that's ok...). I adore Chicago, but I would have to say that Boston is moving into a pretty solid second place to Chi-town. Loved it.

Anyways, before I left, I tried to make a crapload of food since I wouldn't be around (Matt needed sustenance beyond pork chop sandwiches from the 24-7 diner down the road) and I wouldn't have a chance to cook before heading off to the East Coast. In case you didn't know, cooking is a stress reliever for me (i.e. I started this blog 6 months before my wedding, and I'm pretty sure it's the only thing getting me through these final weeks), and in case you also didn't know, I'm TERRIFIED of flying. Like, when it was at its worst, I would have to cover my face with some form of cloth to keep myself from hyperventilating. Now I just pop a few "happy pills" that the lovely docs have given to me and things are almost manageable. That is, unless there's turbulence, or I see a bolt on the wing of the plane coming off...


True story. And it was Southwest.

But I digress.

I wanted to do some cooking to calm my nerves prior to flying, so I decided to do an actual meal, not just a one-pot dish like I'm apt to do. So I picked two veggies that I love and decided to make them BOTH. I picked Brussel Sprouts and Portabello Mushrooms and used the recipes from Veganomicon.

Let's start with the sprouts.

I love brussel sprouts and think I've gotten close to perfecting my own recipe, but I'm never against trying new methods of elaborating upon perfection (I think sprouts are perfection in and of themselves). So, I tried this recipe called "Cornmeal Masala Roasted Brussel Sprouts."

These were...not good. And I say that with a heavy heart. I have loved almost everything I've made from Veganomicon and also love sprouts, so it was a sad day in the kitchen. To be fair, I did mess up a little.

Here's what I did wrong:
-I didn't have chickpea flour, and I thought "hey, I have some dried chickpeas, why not just put those in my food processor and make my own flour like I did with the oats?" Well, friends, not a good idea. I think I stopped grinding before doing any serious damage to my food processor, but we'll have to see when I need to use the sharp blade again. I ended up using normal flour.
-I didn't use any lemon juice.

The flavor was just, not good. It smelled like Thanksgiving in my house as I was cooking, which was unexpected, and the chunks of seasoning were bland and grainy. I really expected much better from this recipe. Oh well. Also, WAY too much oil used on these most delicate buds of nature (I wax poetic when I think of sprouts...).

At least they looked pretty.


Here's the recipe:

Cornmeal Masala Roasted Brussels Sprouts from Veganomicon

8 tbsp. peanut oil
1 1/2 lbs. brussels sprouts
2/3 c. cornmeal
3 tbsp. chickpea flour
1 tsp. salt
1 tsp. garam masala
1/2 tsp. coriander
1/4 tsp. cumin
1/4 tsp. cinnamon
Pinch cayenne
Fresh lemon

Directions:

Preheat oven to 400 degrees. Spread 2 tbsp. of the oil on a baking dish.

Trim and wash sprouts, then lightly dry. Place in a medium bowl and sprinkle with 1 tbsp. of the chickpea flour and some salt. Mix with your hands, making sure that all of the sprouts are thoroughly covered.

In a large bowl, mix cornmeal, remaining 2 tbsp. chickpea flour, salt, garam masala, coriander, cumin, cinnamon, and cayenne if desired. Add the remaining 6 tbsp. of peanut oil and mix. Add the sprouts and mix with your hands until all are coated.

Place sprouts the oiled dish. Scrape out any extra of the cornmeal mixture in the bowl onto the pan.

Place dish in oven and bake sprouts 25 minutes, or until golden brown and tender, removing briefly to turn approximately every 10 minutes. Remove from oven and place in bowl, topping with crunchy bits. Squeeze fresh lemon over the sprouts and serve.

Thankfully, the mushrooms were AWEsome. And pretty easy.

I did a few things wrong with these bad boys as well, however.

Here's what happened:
-I didn't have enough wine to cook with, so I substituted some red wine vinegar and mixed it in with the leftover wine driblets I had. This didn't seem to mess with the flavor, in fact, it made the flavor more pronounced in my opinion, which I loved.
-I had to go to yoga, so I let these shrooms marinate for about an hour and 20 minuted rather than just 20 minutes. This also did not seem to ruin anything, in fact, I believe it helped the flavors POP more.
-Didn't have any tin foil (I hate it when that happens), so I used parchment paper. Not sure what that did.

These were yum. And pretty.

Here they are, marinating their little hearts out.


Here's the recipe, also from Veganomicon.

Roasted Portabello Mushrooms

Ingredients:

2 big or 4 smaller Portobello/flat mushrooms.
1 tbsp olive oil.
2 tbsp soy sauce.
2 tbsp balsamic vinegar.
1/2 cup (125ml) wine
2 cloves crushed garlic

Directions:

Mix all the marinade ingredients together. Stab the topside of each mushroom a few times with a fork, then turn them gill side up in a baking dish or casserole, and pour some marinade into the top of each mushroom so it pools. Pour the rest all over them mushrooms and into the dish. Let it sit for about 20 minutes while you heat the oven at 400F.

Cover the dish in foil and bake for half an hour, then flip the mushrooms over and cook uncovered for another ten minutes.

On an unrelated note, were these shrooms marinaTing or marinaDing??

Here's the finished product/meal!